MOVEit Transfer Multi-Factor Authentication (MFA)
Technical top tips for MOVEit MFTMulti-Factor Authentication (MFA) was introduced into MOVEit Transfer 2017. It gives users accessing via HTTPS an extra layer of security by generating a six-digit authentication code. This is provided to the end-user either by email, or the Google Authenticator app.

Organisation-level administrators configure MFA by going to Settings-Security Policies-Multi-Factor Authentication.
There are only a handful of settings to manage. First, you enable MFA for the organisation, which opens up the rest of the configuration options.
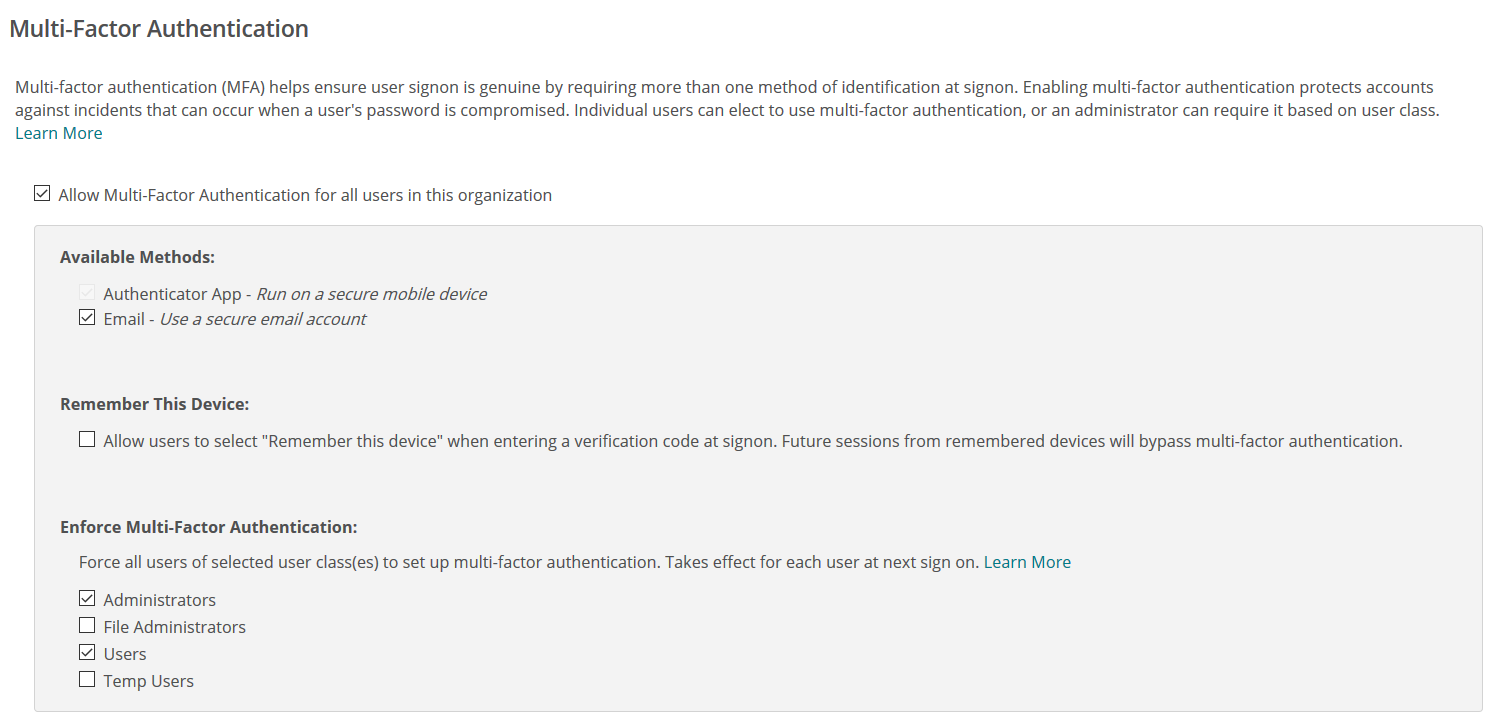
- Available methods
MFA uses the Authenticator App. This is the default method, but you can select to have the authentication code emailed to the end user instead. - Remember this device
Consider selecting ‘remember this device’ carefully. While it means users do not need to complete MFA for subsequent connections from the same device, MFA is effectively skipped. - Enforce Multi-Factor Authentication
Finally, you need to select which class of user needs to complete MFA. This is entirely optional, but it makes sense for Administrators at least. There is not necessarily a benefit for enabling MFA for File Admin access as this is generally reserved for batch accounts. When MFA is enforced, any user in that specified class must set up authentication during the logon process. Not enforcing MFA here does not prevent a user from enabling it. They can do so by following the ‘My Account’ link.
As the name suggests, clicking the ‘Enable’ button turns on MFA.

Using the Authenticator App
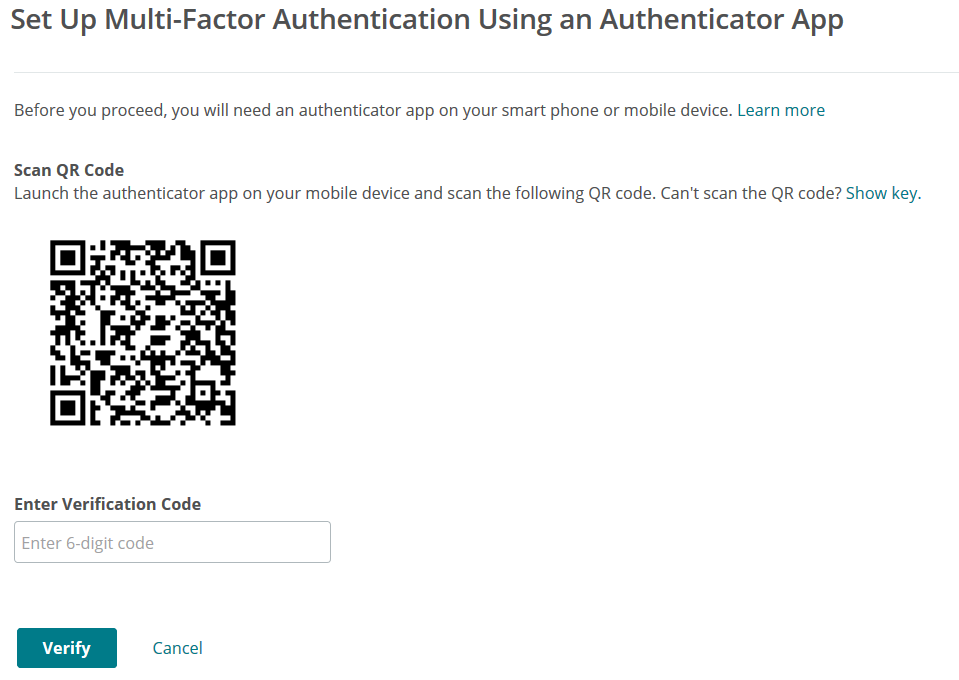
Here users need to use the Google Authenticator app on their mobile phone, scan the QR code displayed on the screen, then enter the six-digit authentication code. This code is only valid for a short period of time (30 seconds), after which a new code is displayed on the screen.
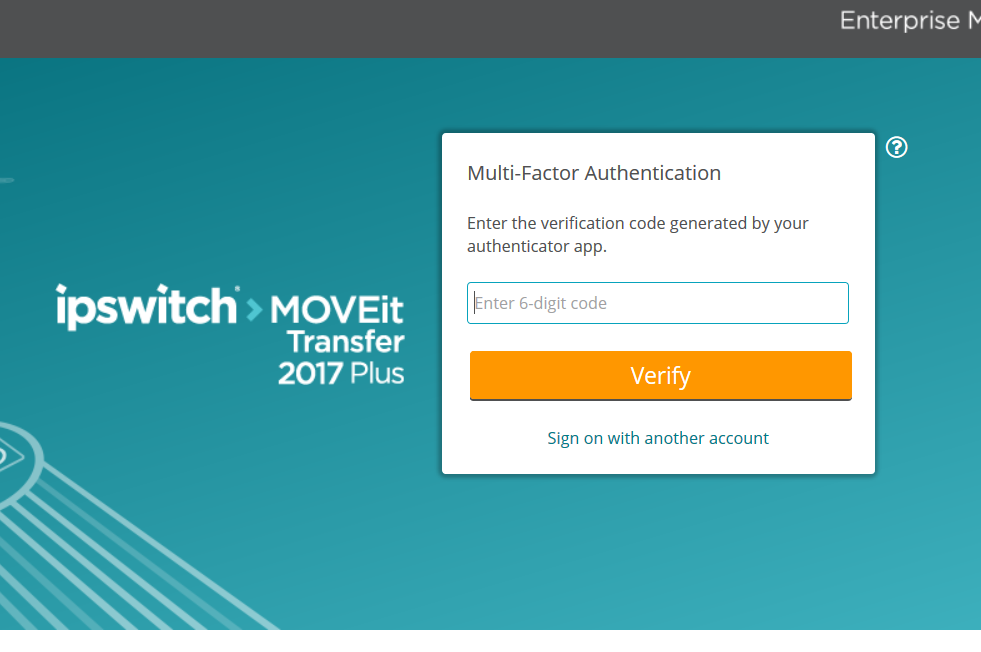
Each subsequent time they login, the user will need to authenticate with a new six-digit code from the Google Authenticator app. They do not need to scan a QR code again.
Disabling MFA
Is the user has a problem with their MFA and needs it disabling, this can be done by an admin through the user profile.
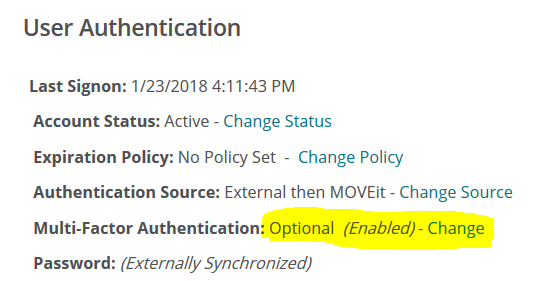
The only option here is to disable MFA; the next time the user signs on and follows the steps above to enable MFA, they will have to go through the process of scanning the QR code again.
Note however that as an admin, you cannot force MFA for a user (unless it is enforced for a user class) – you can only disable it.
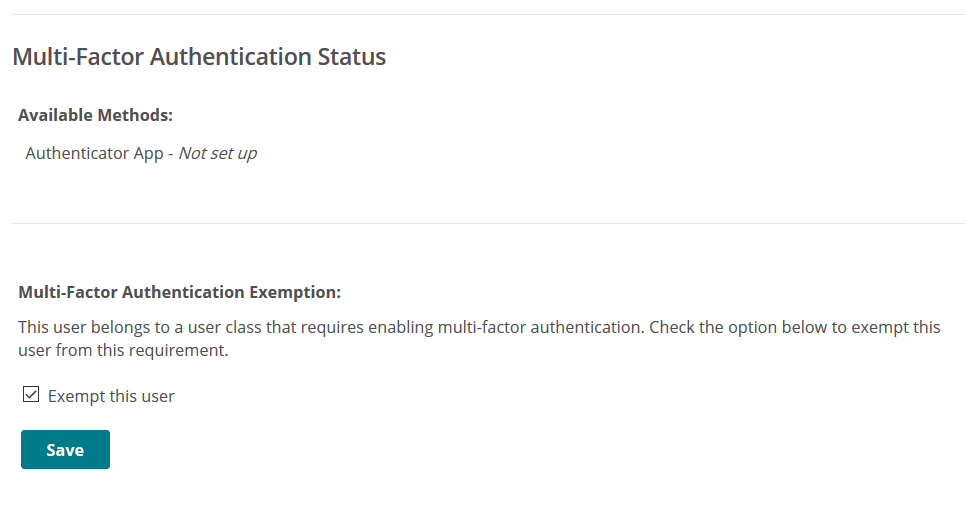
Finally, if you have enforced MFA for a user class, you may then mark individual users as exempt from MFA through the MFA option of their user profile.


Guides:

Need UK-based MOVEit support?
We are certified Progress MOVEit Titanium Partners and our team includes the UK’s leading MOVEit expert.
See our range of support and consultancy services to help you get the most out of your MOVEit solution.


